Conda Environment for Model Evaluation on Gadi
If you do not have ssh access to Gadi, refer to instructions on how to login to Gadi.
The following instructions explain how to load the curated python environment on NCI, which includes packages and scripts supported by ACCESS-NRI. Once loaded, these can be run directly on Gadi via ssh, Portable Batch System (PBS) scripts, or in JupyterLab.
ACCESS-NRI provides code and support, but not computing resources
You do not automatically have access to all /g/data/ storage on Gadi. You need to join an NCI project to view files on /g/data/$PROJECT.
For model evaluation and diagnostics, you need to join projects xp65 and hh5 for code access and a $PROJECT with sufficient compute resources.
What is the access-med environment?
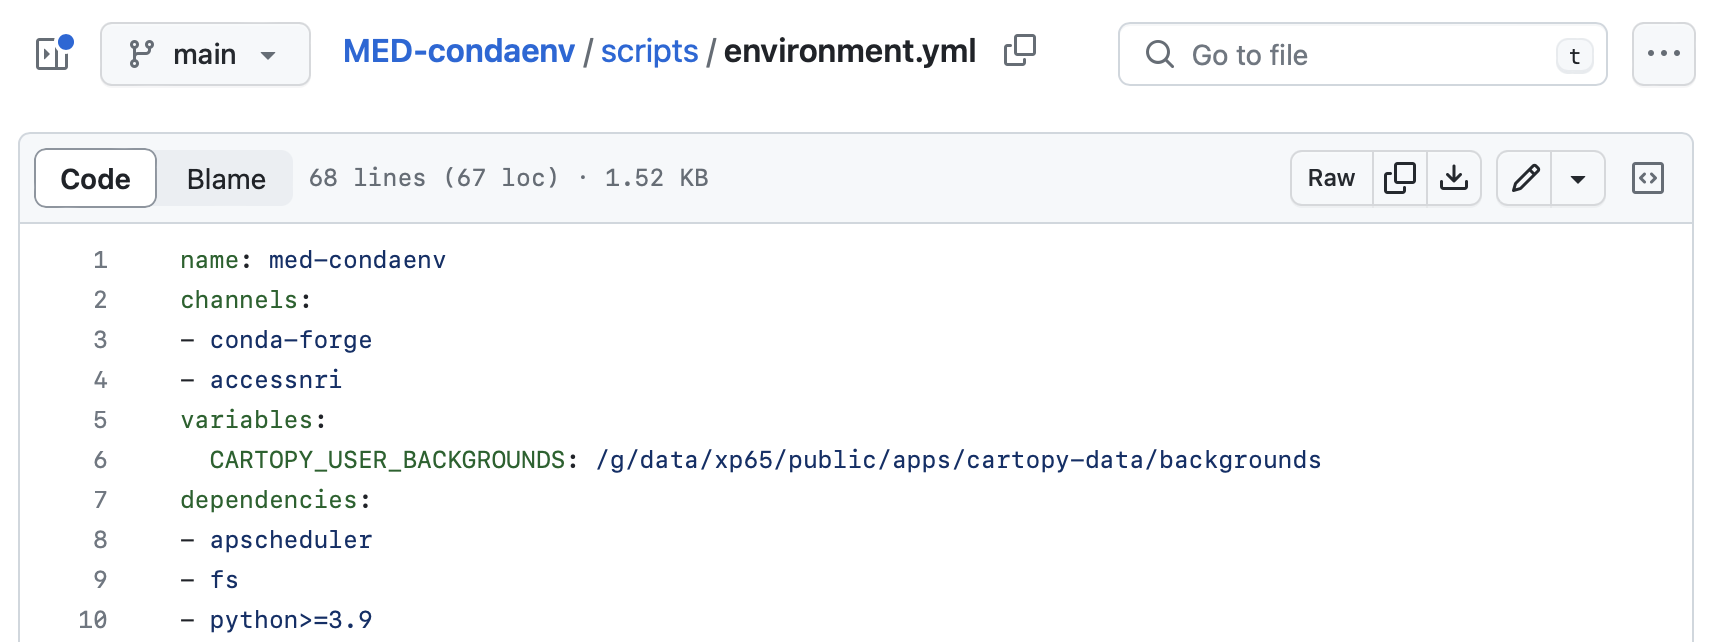
The complete list of dependencies for the access-med environment can be found in the environment.yml file of the ACCESS-NRI MED GitHub repository. Some of these include intake, esmvaltool and ilamb:
Running the access-med environment on Gadi
To avoid running code on Gadi with incompatible packages, a conda environment called access-med is provided.
To change to this curated environment, run the following commands after logging into Gadi and edit your PBS script accordingly:
module use /g/data/xp65/public/modules
module load conda/access-med
This will load the latest version of access-med, e.g. version access-med-0.3.
To check which python version you are using, run the following command:
which python
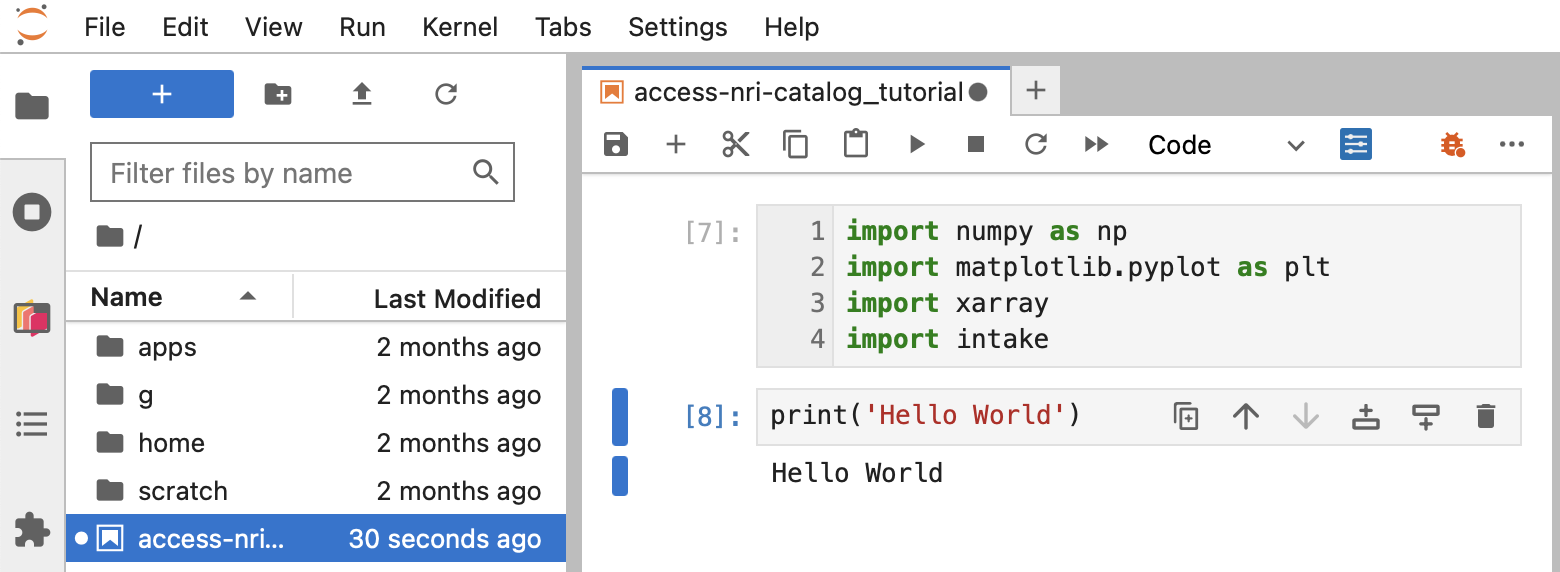
To test everything is working correctly, import the packages in python3 as follows:
import numpy as np
import xarray
import intake
import esmvaltool
print(np.__version__)
print(xarray.__version__)
print(intake.__version__)
print(esmvaltool.__version__)
If you want to run your code on Gadi using a PBS job, add the module use and module load commands to your PBS script as shown in the example_pbs.sh PBS script below:
#!/bin/bash
#PBS -N example_pbs
#PBS -P iq82
#PBS -q normalbw
#PBS -l ncpus=1
#PBS -l mem=2GB
#PBS -l walltime=00:10:00
#PBS -l storage=gdata/xp65
#PBS -l wd

module use /g/data/xp65/public/modules
module load conda/access-med

python3 your_code.py
The content of your_code.py could simply comprise a few lines, such as which conda version and which packages to import.
To submit your PBS job example_pbs.sh, run:
qsub example_pbs.sh
The above PBS script will submit a job to Gadi with the job name example_pbs (#PBS -N) under the iq82 compute project (#PBS -P) in the normalbw queue (#PBS -q). It will use 1 CPU (#PBS -l ncpus=1), 2 GB RAM (#PBS -l mem=2GB), a walltime of 10 minutes (#PBS -l walltime=00:10:00) and data storage access to projects xp65.
Note: to run this example, you need to be a member of an NCI project, in this case xp65 and iq82 projects.
Adjust the #PBS -P option to match your compute project.
When the job starts, it will change to the working directory from where you submitted the job (#PBS -l wd) and load the access-med conda environment.
For more information on running PBS jobs on Gadi, refer to PBS Jobs.
Running the access-med environment on ARE
NCI also supports an interactive coding environment called the Australian Research Environment (ARE). Its use is similar to submitting a PBS job via qsub -I, but with an added bonus of a dedicated graphical user interface for Jupyter notebooks.
For more information, check the Australian Research Environment (ARE) getting started.
Once you login to ARE, click on JupyterLab in the Featured Apps section to launch a JupyterLab instance.
Below are some example values that you should change to match your $PROJECT and use case:
- Walltime (hours)
1 - Queue
normalbw - Compute Size
tiny - Project
iq82(This should match your$PROJECTwith compute resources) - Storage
gdata/xp65+gdata/hh5(Select all that match your project's/g/datastorage) - Advanced Options ... (click button to expand)
- Module directories
/g/data/xp65/public/modules - Modules
conda/are - Launch (click to submit)
This will launch a JupyterLab session with a Session ID, which will appear in the list of interactive sessions. (You can also find it under My Interactive Sessions at the top-left of the ARE window).
The session appears blue while it is loading, yellow or red in case of warnings or errors, and green when it is successfully running:
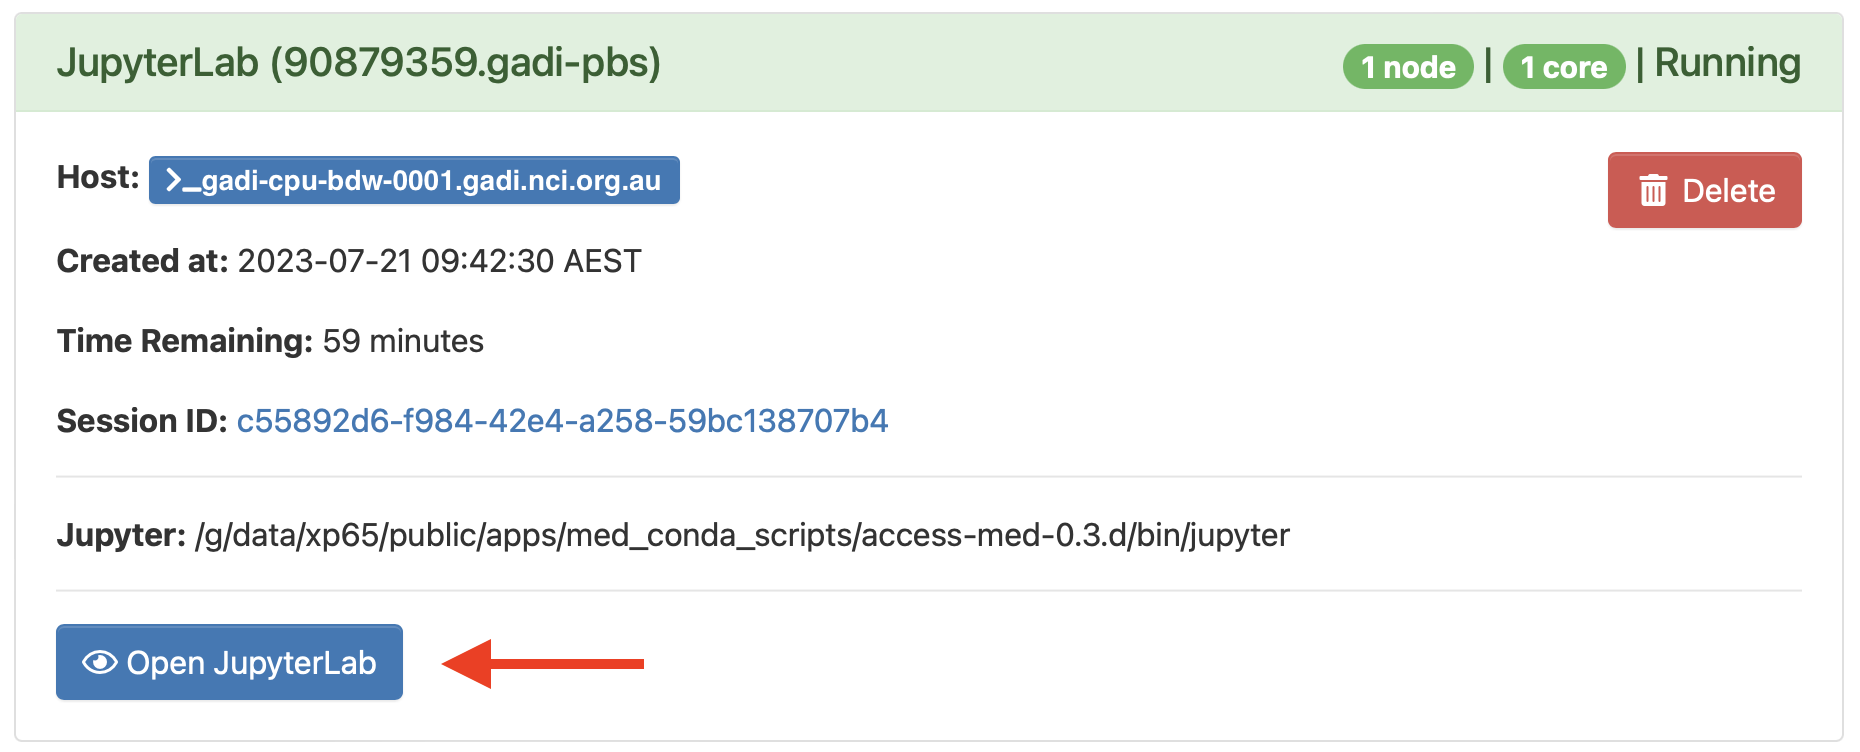
Launch JupyterLab by clicking on the Open JupyterLab button at the bottom of the session.
This will open a window which contains a directory structure on the left and a Jupyter notebook on the right, as shown below.
If you loaded the modules from hh5 or xp65, you should be able to import python packages such as numpy, xarray or intake, as shown below: