Australian Research Environment (ARE)
ARE is a web-based graphical interface for performing your computational research, provided by NCI.
ARE gives you access to NCI’s Gadi supercomputer and data collections.
There are multiple applications included in ARE, but the two most used for ACCESS-related activities are Virtual Desktop (VDI) and JupyterLab.
Prerequisites
To use ARE, you must have an NCI account and be a member of a project with computing resources (known as Service Units, or SU). For instructions on how to set up an account and join projects, refer to Set Up your NCI Account.
Start an ARE session
To start an ARE VDI session go to the ARE VDI Desktop page.
To start an ARE JupyterLab session go to the ARE JupyterLab page.
Session options
Launching an ARE session is similar to submitting an interactive PBS job that enables you to connect to a Gadi computing node.
Hence, there are multiple PBS directives and other options you can select:
-
Walltime (hours)
Number of hours your VDI session will run for (unless manually ended earlier).
The maximum number of hours an ARE session can run for depends on the selected Queue. For more information, check Gadi Queue Limits.Warning
Once the session ends any operation still in progress on the session's computing node(s) will be immediately terminated.
-
Queue
Gadi queue that your session will be scheduled in. For more information check Gadi Queue Structure. -
Compute Size
Amount of resources (CPUs, Memory, etc.) available to your session.
You can either choose a pre-configured option, or select a custom one (e.g., cpus=6 mem=40G). -
Project
The NCI project the ARE session will be charged to.
You must be a member of the specified project.Warning
The specified project must have allocated Service Units (SU).
For more information, check how to join relevant NCI projects. -
Storage
/g/data(inserted as gdata/<project-ID>)/scratch(inserted as scratch/<project-ID>) data storage projects that will be available to the session.
In ARE, data storage locations need to be explicitly defined. This means that you need to insert any/g/dataand/scratchproject folders you want to execute data I/O operations from.
Multiple storage projects are separated by a plus (+) (e.g., gdata/tm70+gdata/hh5+scratch/xp65).Warning
Generally, you need to be a member of the specified projects to access their storage data.
If you try to access data from a project folder not included in the session's storage, you will get an error similar to the following:
<cmd>: cannot access '</path/to/file>': No such file or directory -
Software
Software licenses that are requested for your ARE session. Leave blank if no license needed.
Multiple licenses are separated by a colon (:).
Advanced options
-
Extra arguments
Additional arguments to pass on the JupyterLab command line (e.g.,--debug_,--log-level=INFO) -
Module directories
Include module directories.
It is the eqivalent ofmodule use </path/to/module/directory>run on the command line.Warning
You also need to include the project directory of each module directory in the Storage option.
-
Modules
Include modules.
It is the equivalent to runningmodule load <module-name>on the command line.Warning
If the module is not inside Gadi's default module directory
/apps/Modules/modulefiles, you need to include the module directory in the Module directories option. -
Python or Conda virtual environment base
Path to a Python or conda base environment to be activated for the JupyterLab session.
It is the equivalent to runningsource <path/to/environment/bin/activate>on the command line.Warning
You also need to include the project directory of the virtual environment in the Storage option.
-
Conda environment
Name of a specific conda environment to be activated for the JupyterLab session.
It is the equivalent to runningconda activate <environment-name>on the command line.Warning
You need to include the path to the conda base environment in the Python or Conda virtual environment base option.
-
Environment variables
Environment variables passed to the session. Identical to the-vPBS directive.
Multiple environment variables are separated by a comma (,). -
Jobfs size
The maximum amount of local disk available to the session.
If missing, it is automatically set to 100MB. -
PBS flags
Extra PBS directives to be used for the ARE job submission. -
Pre-script
A script or executable that will be run just before starting the ARE session.
Launch the session
-
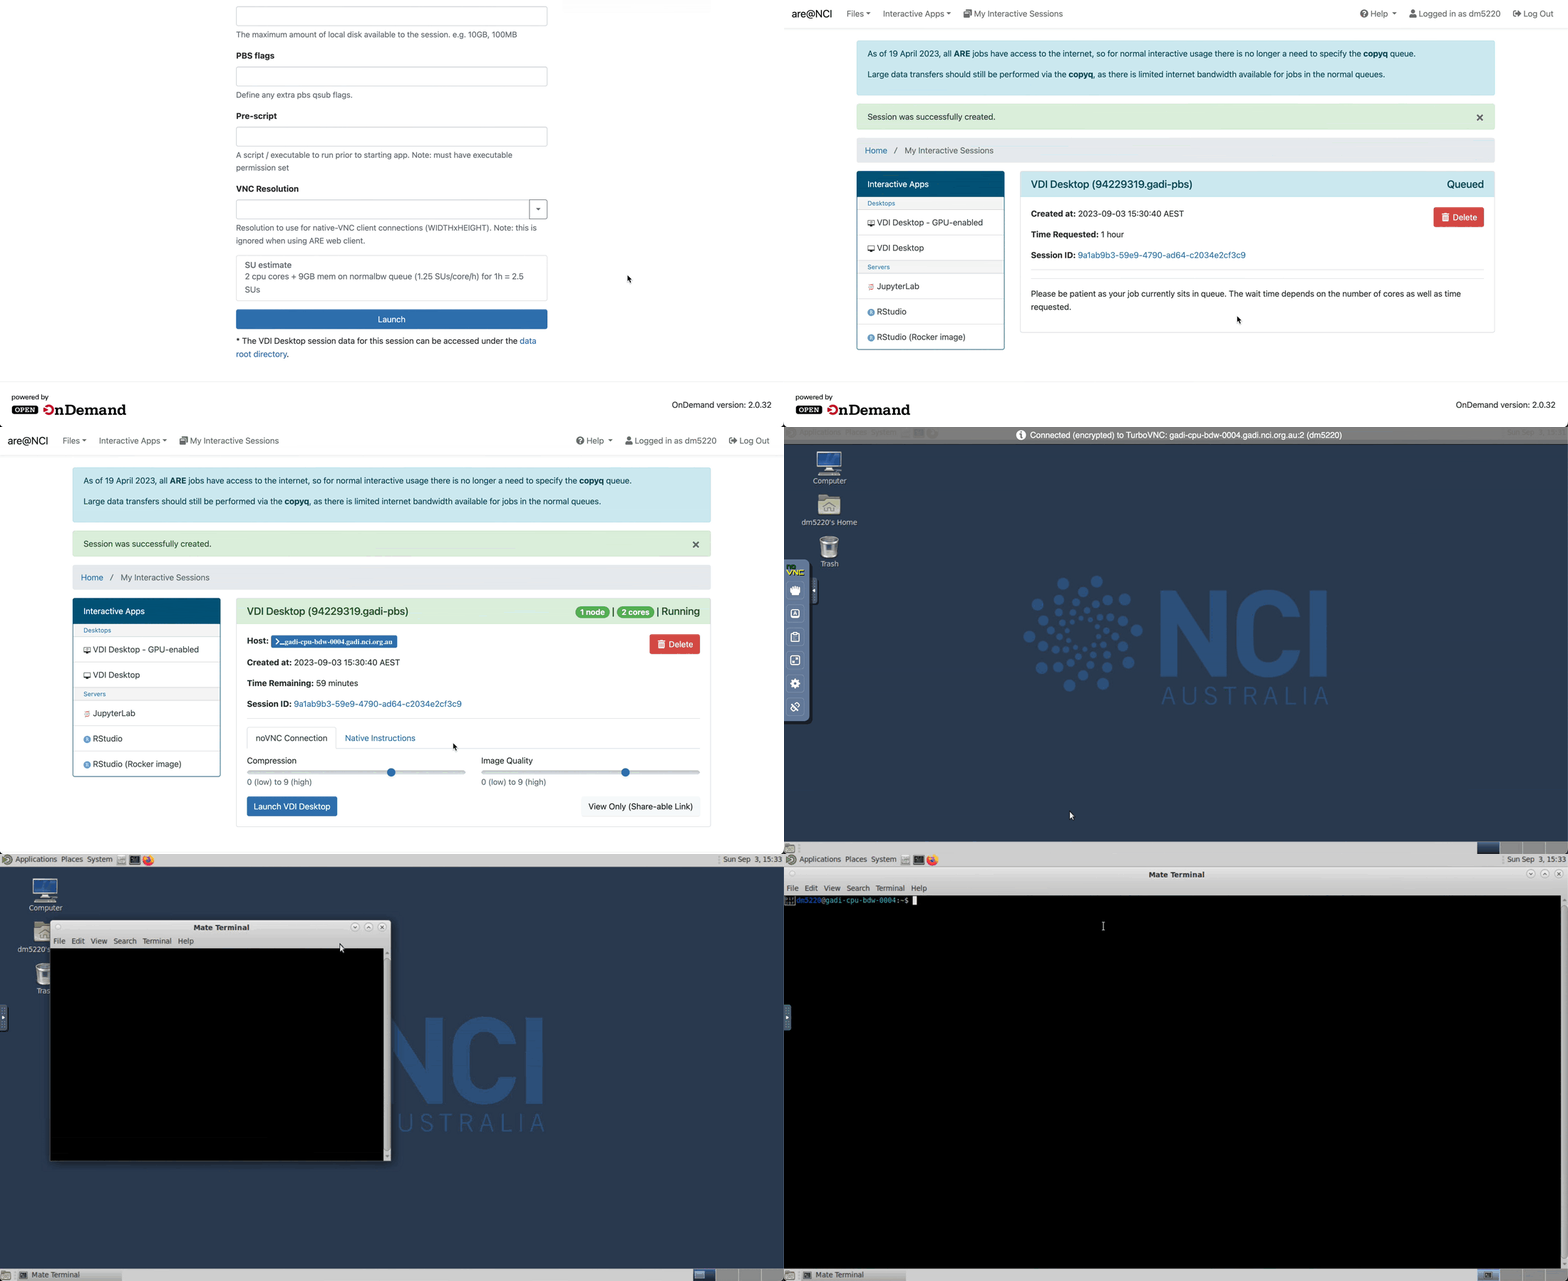
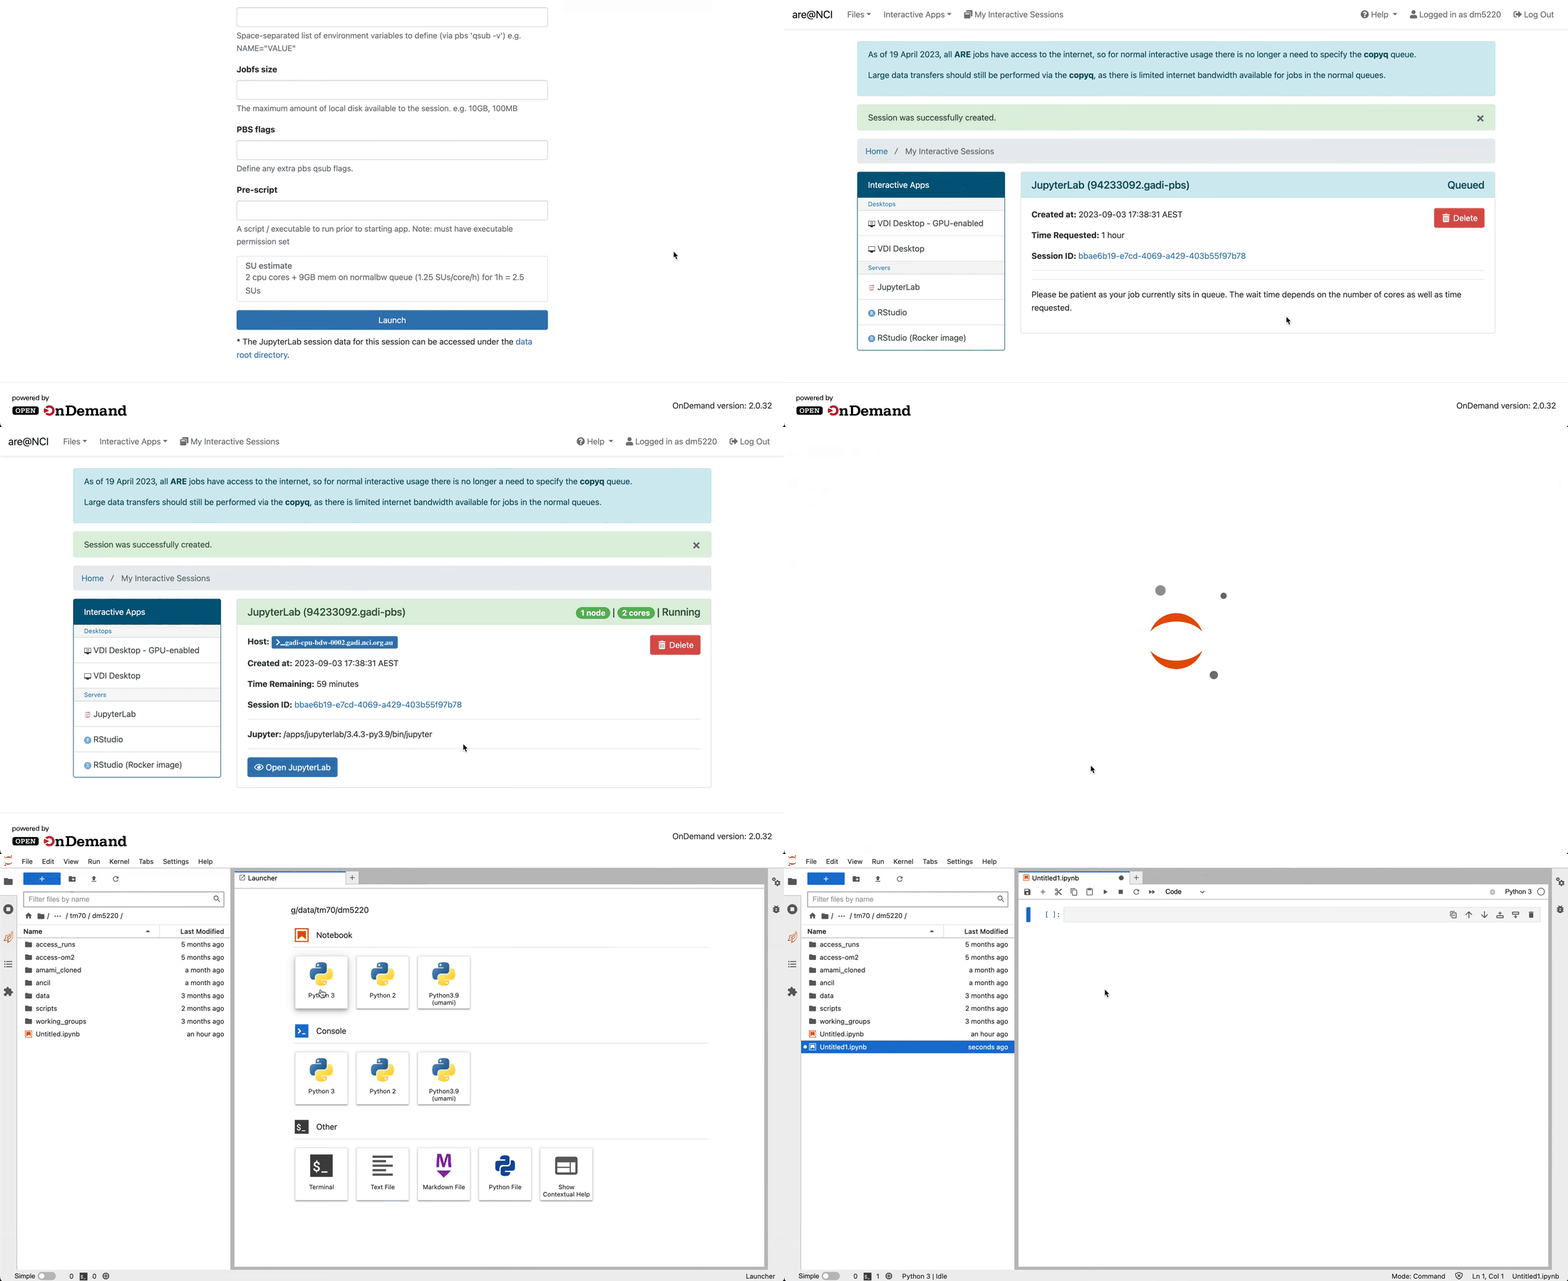
Click on the Launch button to launch the session. You will be prompted to your Interactive Sessions page and you will see your last requested session at the top.
-
Wait until your session starts and then click on the Launch VDI Desktop button to open a new tab with the VDI interface.
Inside the VDI interface, you can open the terminal by clicking on the black terminal icon at the top of the window.
Wait until your session starts and then click on the Open JupyterLab button to open a new tab with the JupyterLab interface.
Inside the JupyterLab interface, you can open a new notebook by clicking on the Python3 Notebook button in the Launcher panel (to open a new Laucher panel, click on the plus button next to your current tab).

Delete an ARE session
You can delete a session before its automatic expiration (based on the specified Walltime by clicking on the session's  button in the Interactive Sessions page.